
Why Your Website Photos Look Blurry (And How to Fix It)

USING YOUR BRAND PHOTOS
You spent good money on brand photos. You were excited to finally update your website.
And then… you uploaded them and they look blurry. Or fuzzy. Or just not as good as they should.
Rude.
This is one of the most common issues I see, so let’s fix it once and for all.
How to Fix Blurry Website Photos
Why your photos look blurry online
Most website platforms automatically resize and optimize images for different screen sizes. In theory, that’s great. Your site should look good on an iPhone and a massive desktop monitor.
In reality? If your images aren’t sized correctly before you upload them, the platform does its best and sometimes misses the mark. That’s when things get blurry.
We’ve all been told to use “small web-sized images” so our sites load fast. That advice isn’t wrong, but it’s incomplete.
The correct image size depends on how the image is being used.
The two image sizes you actually need
Let’s simplify this.
1. Banner or full-width images
Any image that stretches across the full width of your site needs to be larger than you think.
• At least 2500px wide
• File size under 500KB
Yes, both matter.
Pixel dimensions keep the image sharp on large screens.
File size keeps your site from loading at a snail’s pace.
2. All other images
For images used in galleries, blog posts, or side-by-side layouts, 1500px wide is usually perfect.
Anything bigger is overkill. Anything smaller risks looking soft.
Resize before you upload. Always.
This is the step most people skip.
Your photographer likely delivered high-resolution images. That’s good. Those are meant to be printed. They are not meant to live directly on your website.
For example:
A typical brand photo might start at 5287 × 3525px and 9.2MB.
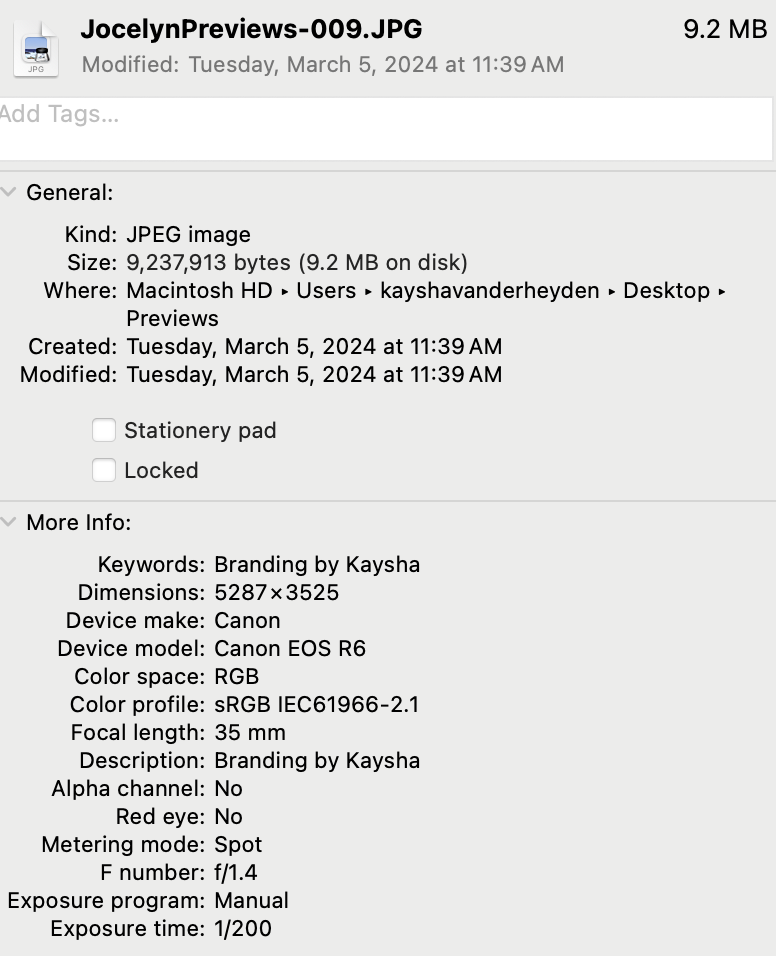
Great photo. Terrible website image.
You want to resize before uploading.
I love Adobe’s free image resizer because it’s fast and painless.
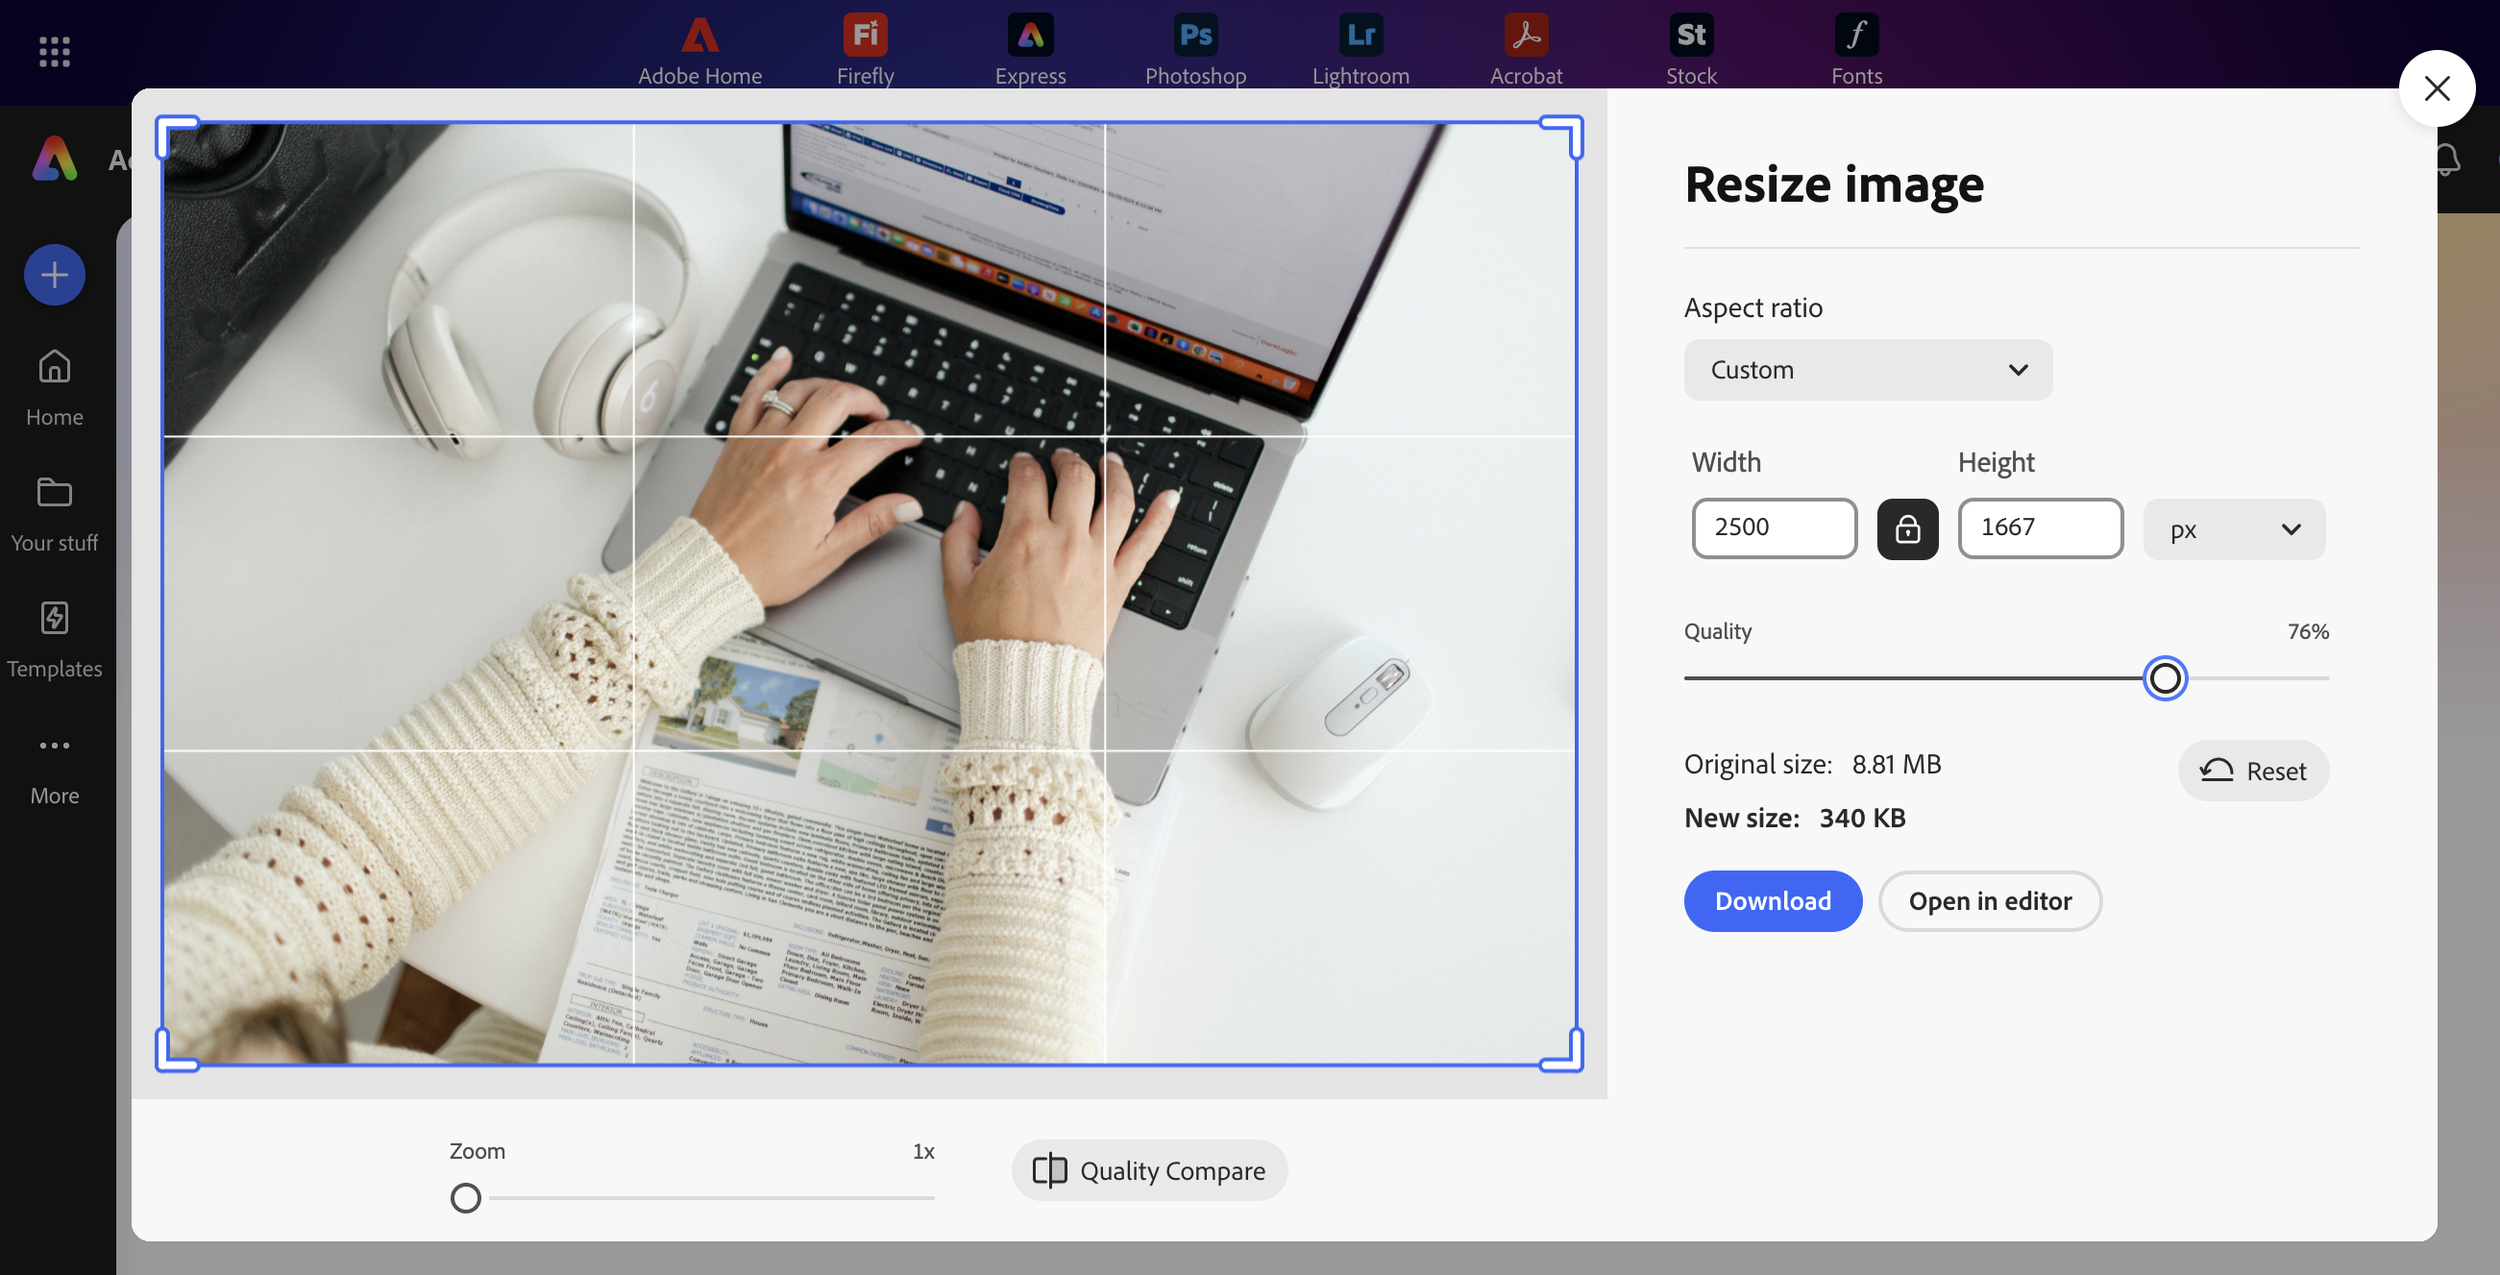
You can:
• Set custom dimensions
• Crop if needed
• Export in one step
When exporting, setting image quality around 75% usually hits the sweet spot between sharp and lightweight.
Quick workflow I recommend
Resize the image to the correct pixel width
Export under 500KB for banners (adjust the quality slider)
Rename the file with something like filename-webready
Upload to your site
That’s it. No drama. No blurry photos.
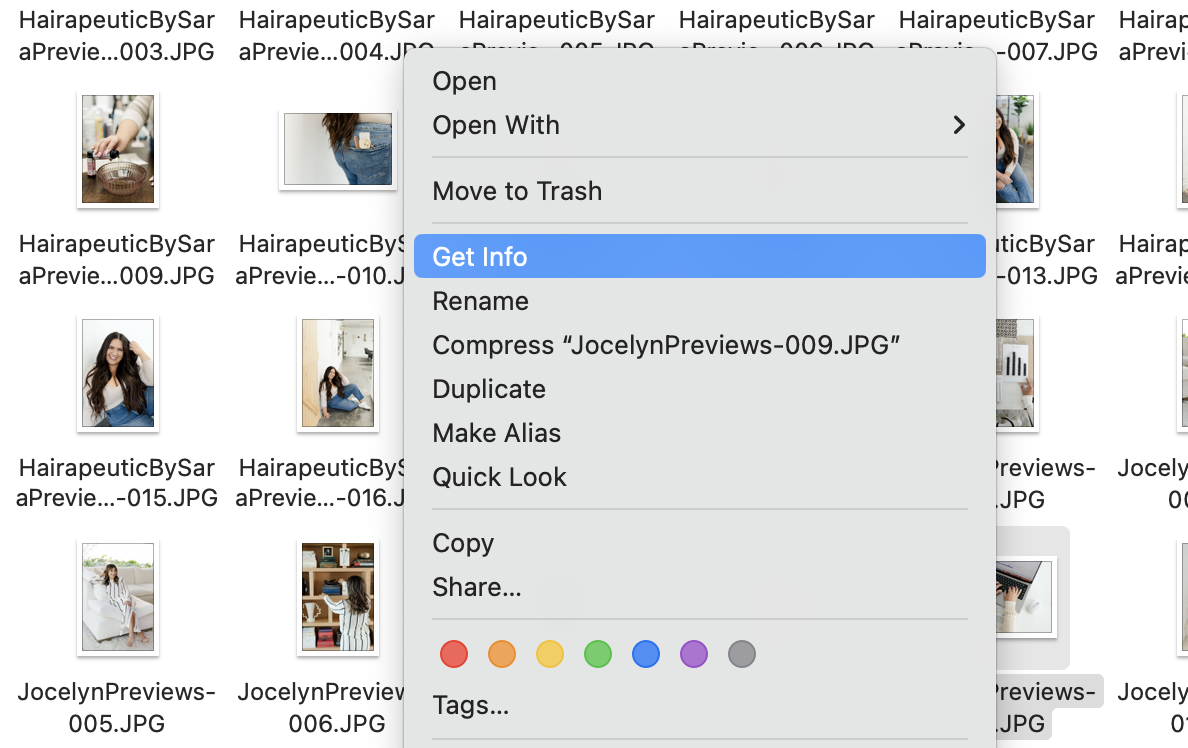
One last tip
If you ever want to check an image’s size, right-click the file on your computer and select Get Info. If it’s huge, resize it.
Do this consistently, and your website will look polished, professional, and fast, which is exactly what your brand photos are supposed to do in the first place.
If your photos aren’t looking amazing online, it’s rarely the photos. It’s the sizing.
Need Brand Images For Your Website?
Let’s chat about how we can create brand images that will make your website feel polished and instantly communicate your brand message!